
Revo MAX | 3D printer UI/UX Design
Designer 方芊文 / 王潔恩
Project Highlights
Turning complex hardware capabilities into a simple and consistent user experience.
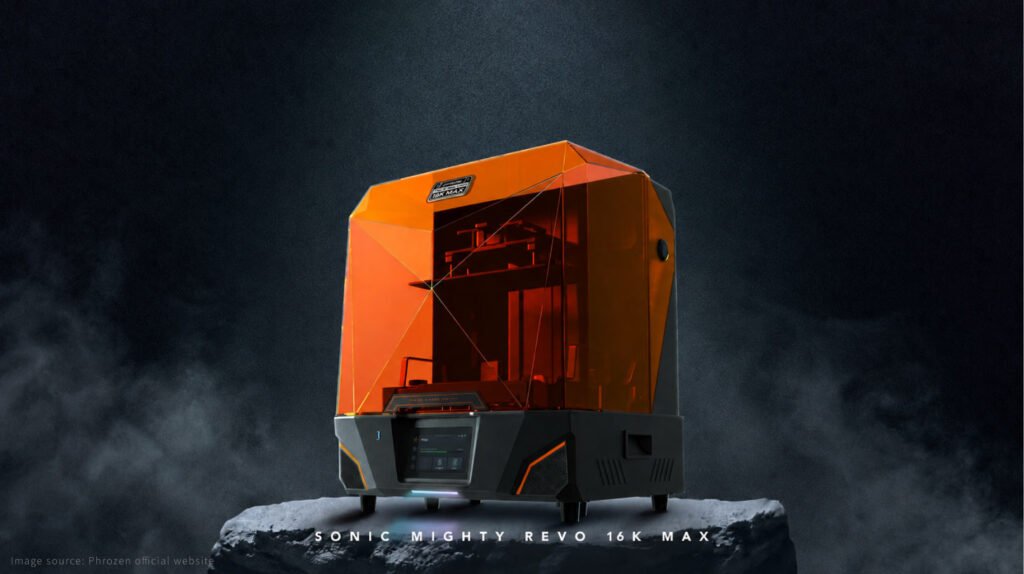
Revo MAX is a large SLA 3D printer. I was responsible for the UI/UX design, from user flows and interaction logic to interface design, working closely with software, firmware, and cross-functional teams.
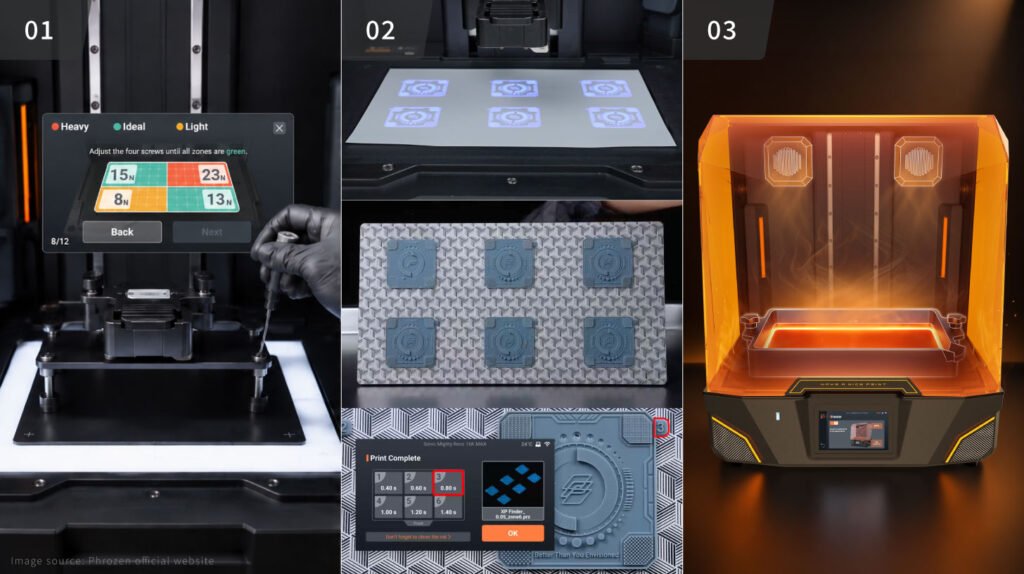
In 3D printing, Bed Leveling, Exposure calibration, and Resin Heating can directly affect print stability and success. Through hands-on testing, cross-team feedback, and exploring the capabilities of the hardware, I redesigned the workflows and information display for these complex functions.
Three Key Improvements
01 Bed Leveling
Changed the traditional leveling method, which relied on paper and hand feel, into a visual pressure-sensing system.
02 Zonal Exposure
Test multiple exposure settings in a single print, reducing the time and material needed for resin calibration.
03 Heating Experience
Reworked how the heating function connects with the printing process, making the operation clearer across different use scenarios.
01 Bed Leveling
From Hand Feel to Clear Visual Feedback
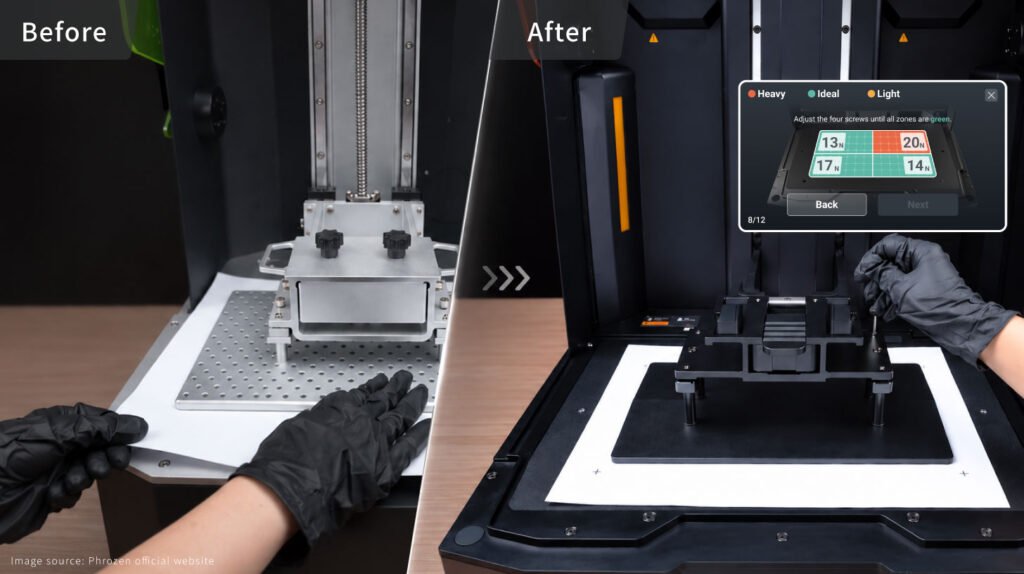
Traditional SLA 3D printers often require users to place a sheet of paper between the build plate and LCD screen, then pull the paper to feel the friction and adjust the height of each corner. This method relies heavily on personal judgment, making it difficult to know whether the build plate is properly leveled.
Revo MAX uses four-zone pressure sensing, so I redesigned the bed leveling process to turn the hard-to-judge “hand feel” into clear visual feedback.
Clearer Information Hierarchy
Made key information larger and used color to highlight important steps, helping users quickly understand what to do.
Clearer Information Hierarchy
Changed steps that were difficult to explain with a single image into GIFs, showing users exactly how to perform each step.
Visualizing Pressure
Used large color blocks to show the pressure distribution while keeping the numerical values visible. This allows users with different levels of experience to adjust the build plate more easily.
02 Zonal Exposure
Test Multiple Exposure Settings at Once
Different resins require different exposure settings, and exposure time can affect print results. Users usually need to run multiple tests and compare the results.
Revo MAX uses its zonal exposure capability to set different exposure times for each area. Instead of running multiple tests, users can test several exposure settings in a single print and compare the results quickly.
Streamlined Workflow
Combined zone setup, resin selection, exposure time, and test model selection into one complete workflow.
Flexible Settings
Provided two exposure modes: Incremental and Custom. Incremental mode helps users quickly set up a test range, while Custom mode allows more precise adjustments.
Match the Printed Results
Displayed the zones from the user’s viewing direction and added numbers to each test model. This makes it easy to match each printed result with its exposure setting.
03 Heating Experience
Making Heating Simpler and Clearer
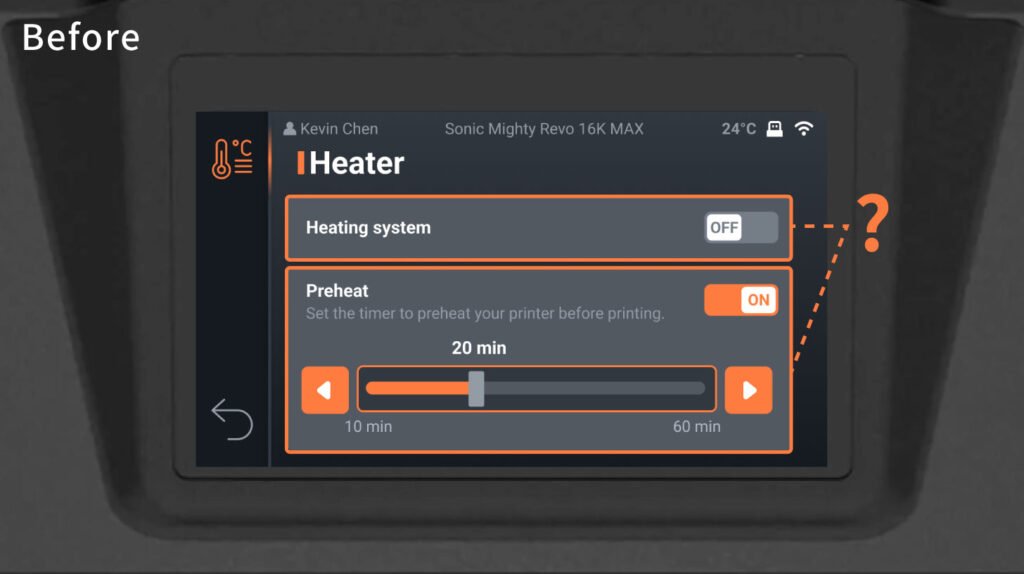
Originally, Heater and Preheat were controlled separately, making it difficult for users to understand how they worked together.
Combining Heating Functions
We found that users mainly turned on the heater to preheat the printer before printing and keep it heated during printing. I combined Preheat and Heater into a single switch to make the process simpler.
Showing Heating Status in Real Time
Displayed the current temperature and resin vat heating status in real time on the Heater page. Visual indicators help users quickly understand the current heating status.